Custom lettering for a Custom Design Circus Invitation
If you’re looking for vibrant and unique stationery for an important occasion, custom lettering could be just what you need. Customer lettering with watercolour painting illustrations are great for creating a very special invitation suite that you’ll love sending out and your guests will love receiving.
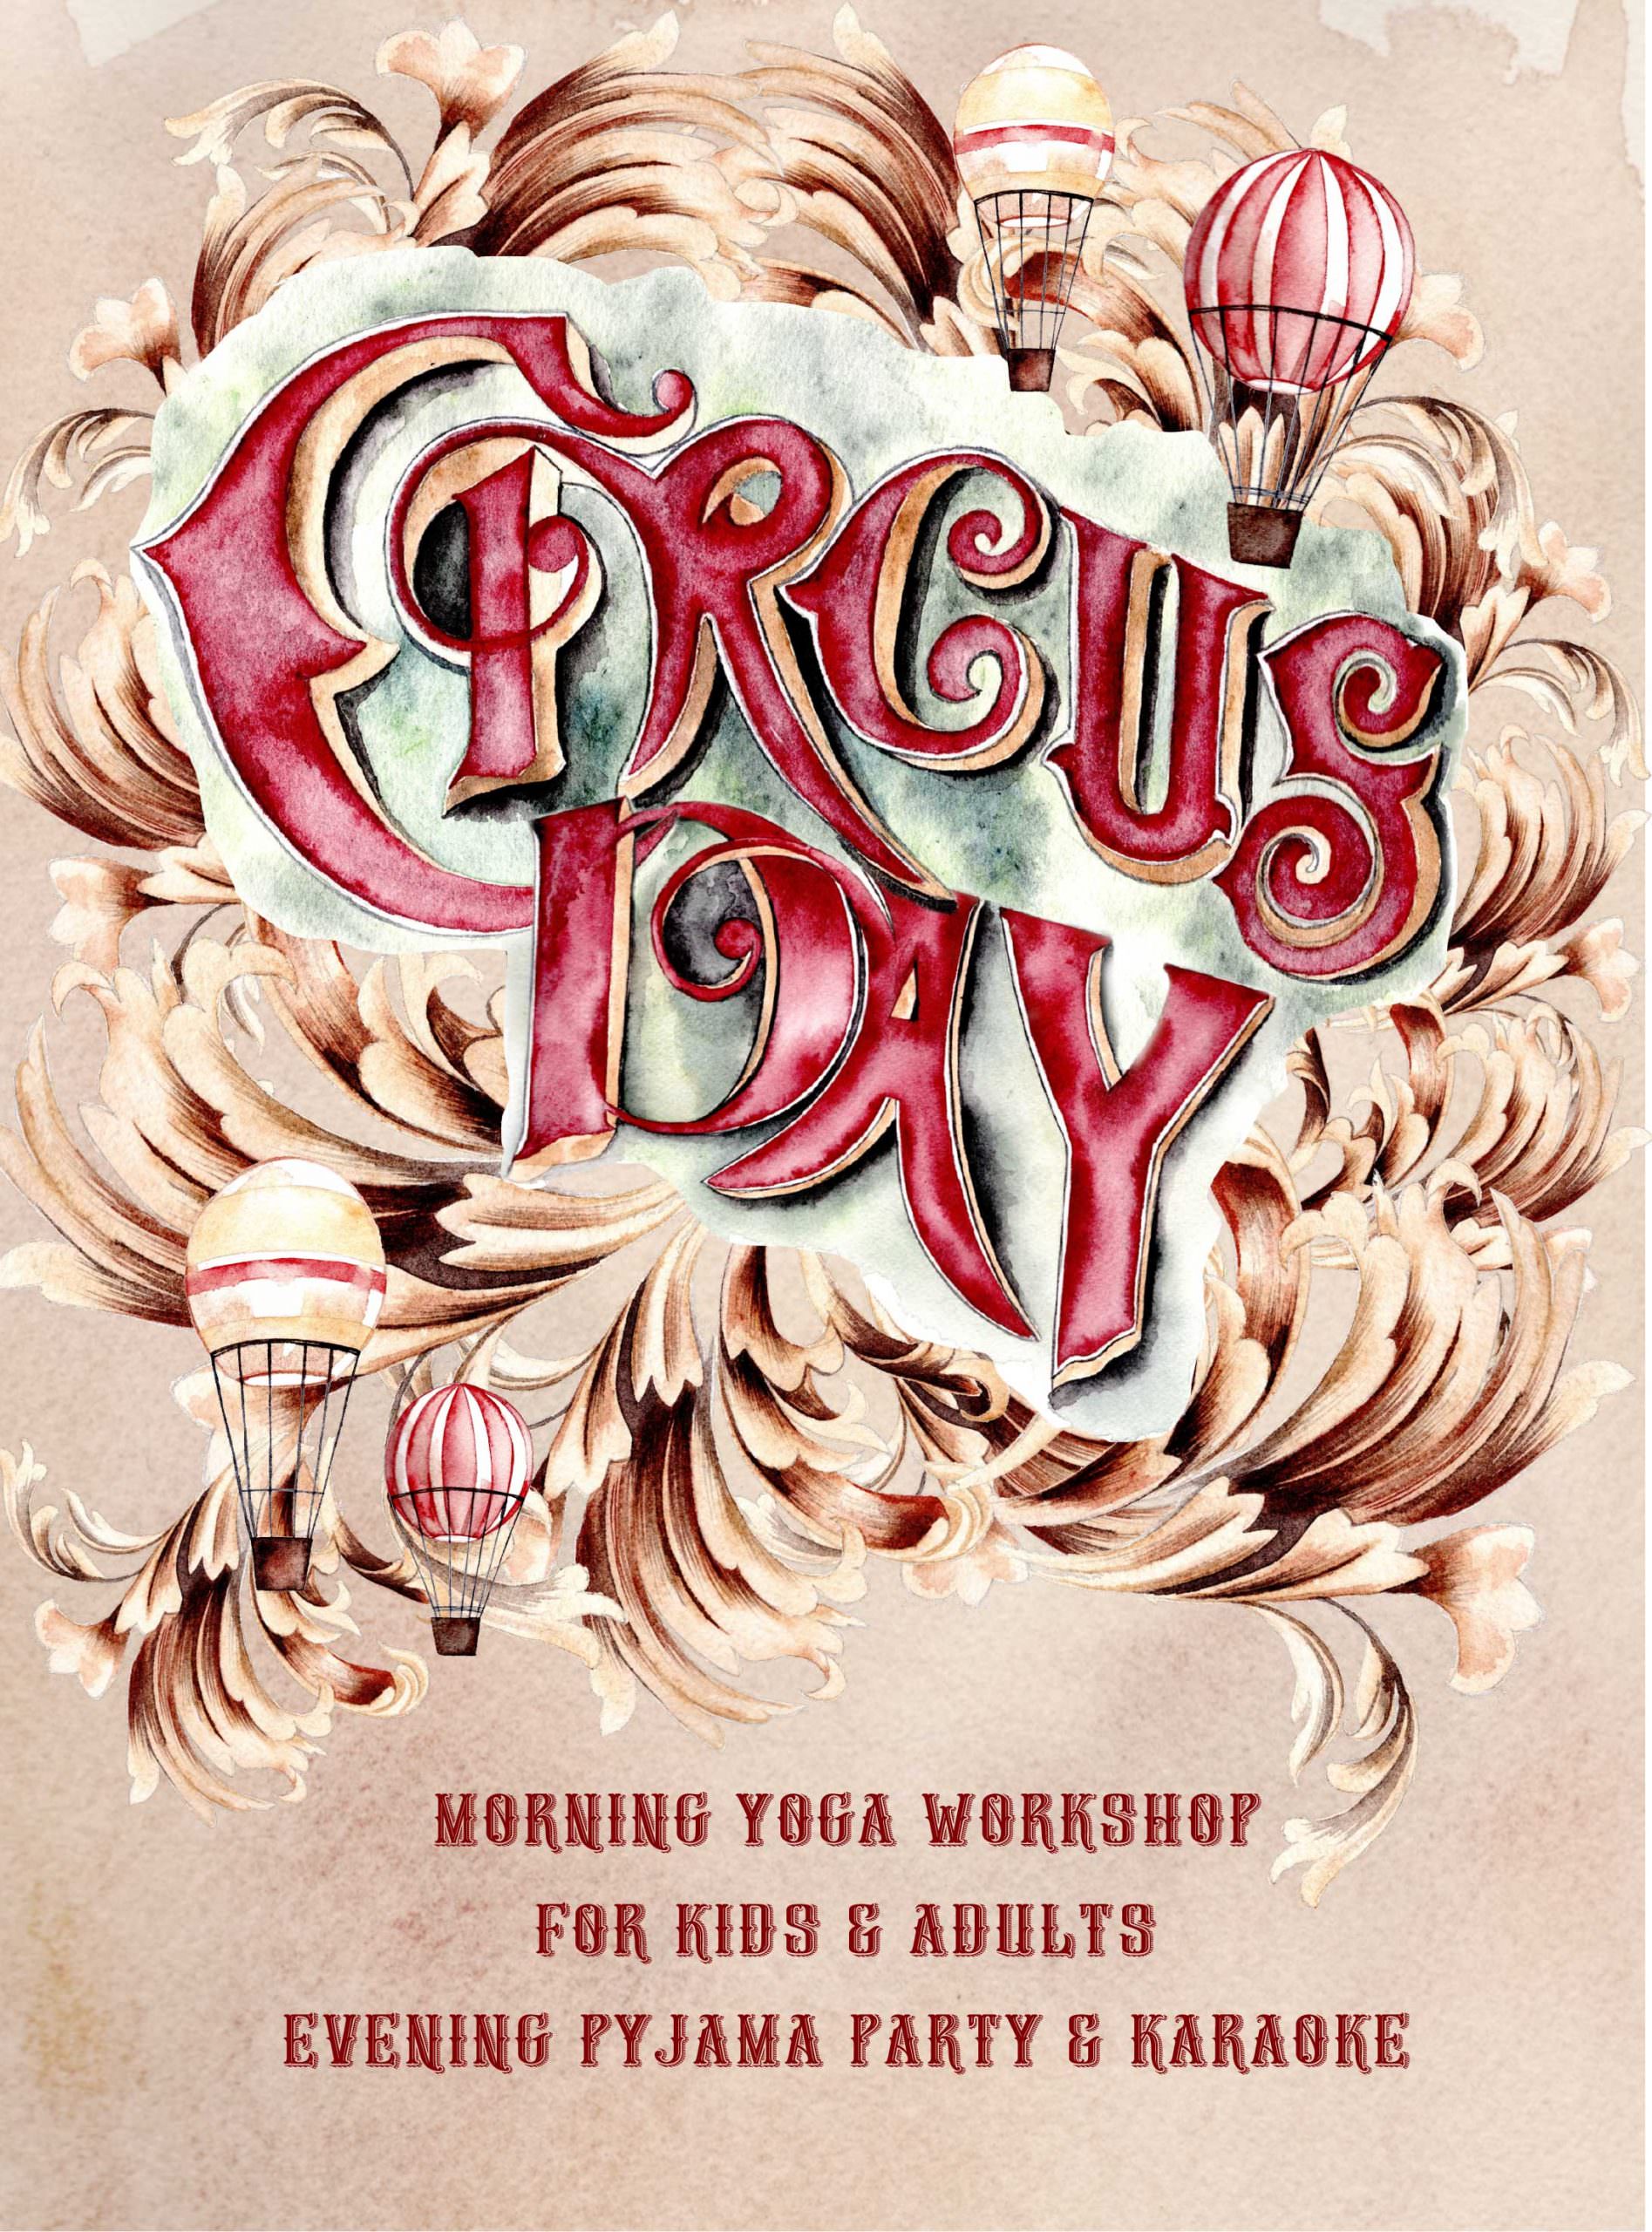
Below you can see the final design that I arrived at after a long design process with a client. The final design is very unique and highlights the beauty of vintage, circus design.
The final circus invitation design
I’m Rubana, the owner and design behind Crimson Letters. If you might have an exciting project or special event coming up, why not reach out and see if we’re a good fit? I would love to bring your vision to life. Email me at rubana@crimsonletters.com or use my contact page to leave a message.

Custom lettering and circus invitations don’t have to be dainty or old-fashioned! These can be bold and brilliant designs that make the perfect statement for your event.
In fact, I recently worked on a really exciting project creating custom-designed circus invitations for a special celebration. This was far from my usual moody style, so I thought I’d share my step by step process with you so you can see how it was created and how I work on projects like these.
You can check it out below.
Stage one: Custom Lettering – Understanding what you want
Before I even put pencil to paper, I work closely with my clients to find out exactly what they want from their custom lettering. I believe it is so important to work closely with all my clients to ensure I create stationery that meets their exact specifications and that they’re guaranteed to love. The design will depend on the event they’re hosting, their personal style and the colour scheme.
Stage two: Putting ideas together
Once I’ve got a good idea of what the client wants I can begin putting some ideas together. I will start playing around with sketches and different lettering styles to come up with a design I think they’ll love. In this case, it was a circus theme which meant sharp, bold letting and the traditional red and yellow colour palettes we associate with the circus.
Stage three: Starting the custom lettering
Once the design is confirmed I can begin sketching. It takes a lot of perseverance and skill to sketch the outline of each letter. It’s a very delicate and intricate process and one that cannot be rushed.

Stage four: Adding the watercolour
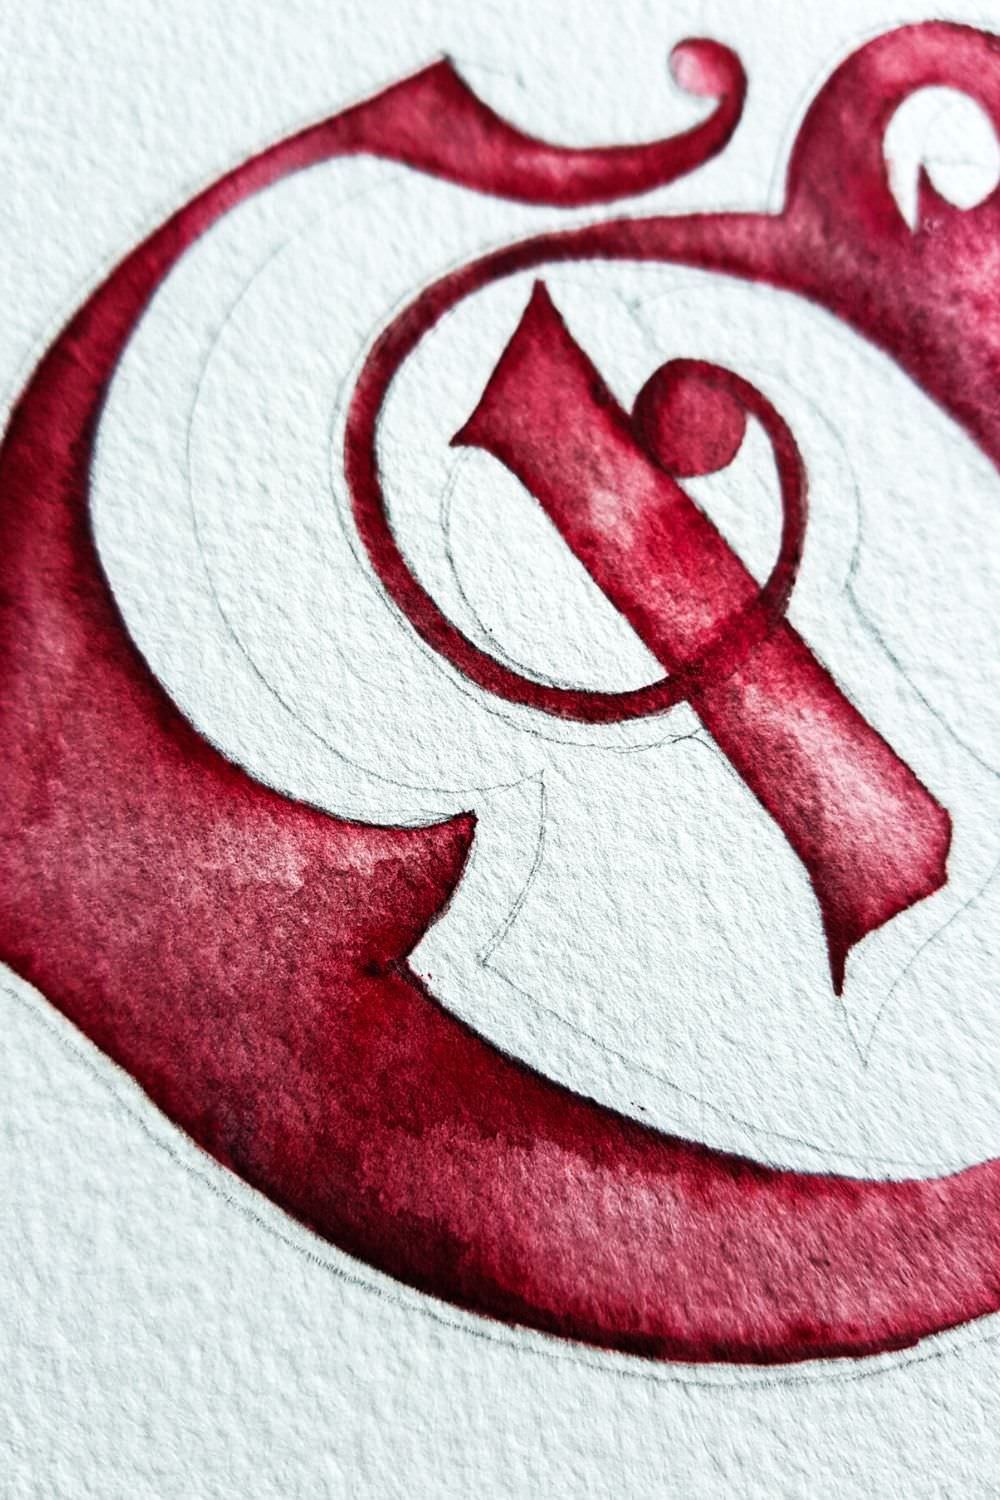
The next step is to add the watercolour to the finished sketches. Applying the watercolour needs to be careful and precise as I build up the layers. Slowly building up the watercolour in this way adds depth and shadow to the lettering and makes for a vibrant finish. When working on this project I started with the red watercolour, gradually building it up for a deep finish, followed by the yellow.
Stage five: Outlining custom lettering
Once the majority of the watercolour is in, I very carefully outline the lettering where required. This can really help to define each letter and make it stand out on the page. In this case, I used delicate black lines to make the red and yellow really pop.
Stage six: Adding the background
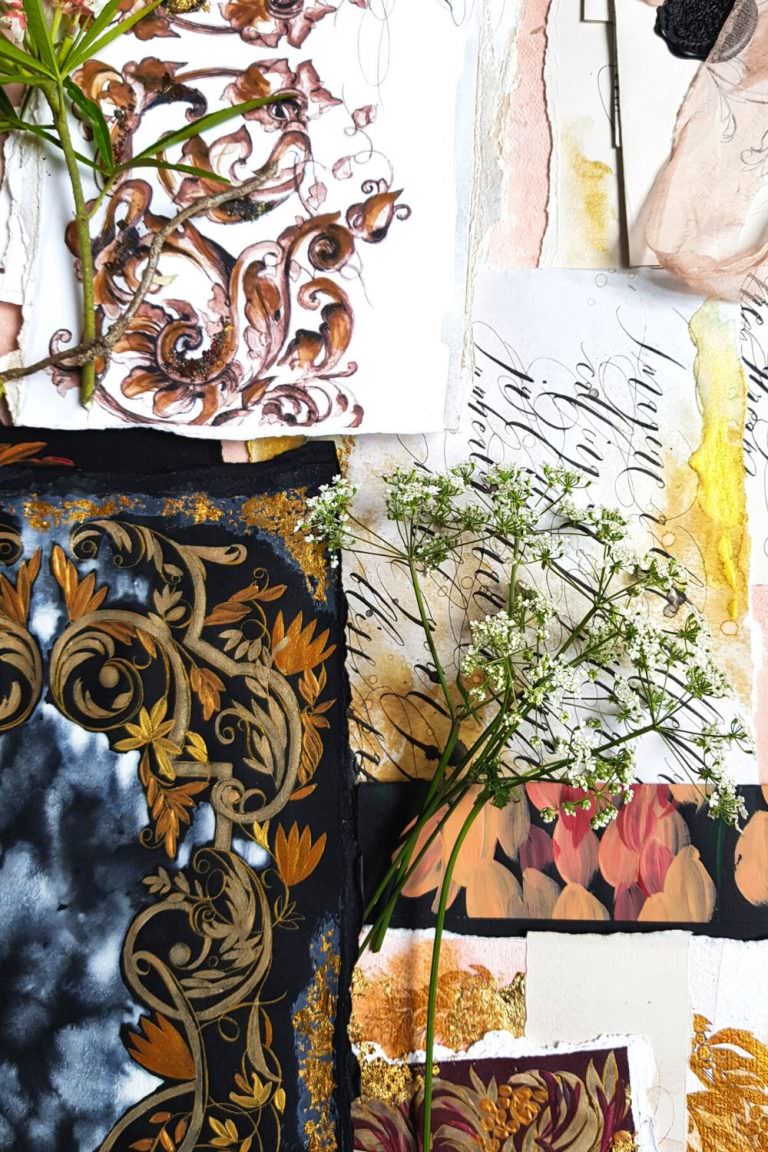
Now the lettering is done, it’s time to add the background shading or watercolour illustrations (depending on the design). Adding these details around the writing can further emphasis the lettering and complete the artwork. For my circus designs, I used a mixture of black, green and blue to complement the colours used in the lettering and to build upon the circus theme.
Stage seven: Accompanying artwork
Of course the custom lettering is the original the show-stopper, but to complete your stationery suite I will also create some beautiful accompanying artwork. You can see here that I created five detailed pieces of artwork to complete the circus invitations. These can really help to extend the theme for a truly memorable event.

The ferris wheel below took particularly long to draw out and to watercolour, there were many details to consider.

How long does it take to create these invitations?
As you can imagine, this is not an overnight process. It takes time to come up with the perfect design to suit your requirements. Then, it must be delicately hand-drawn and painted with the watercolours.
Because of the delicate nature of the customer lettering, plus the time it takes to create the accompanying artwork, the entire design process will take about 3-4 weeks to finalise, in addition to another 1-2 weeks to work on design revisions and final tweaks. So if you would like to work with me, please bear this in mind.
Here below are some examples of circus invitation designs with the above artwork.
By the way, I’m a maximalist, not a minimalist, can you tell?


Want your own custom lettering invitations?
No matter what event you’re hosting unique invitations are the perfect way to set the tone for the big day, so why not consider bespoke hand-painted stationery like this? This guide was designed to give you some insight into how I work and what is possible when it comes to custom lettering, so I hope this has you feeling inspired!
So if you are looking for beautiful invitations and artwork of your own, featuring hand-painted watercolour illustrations, I’d love to hear from you! Email me at rubana@crimsonletters.com or get in touch here. And while you’re there, why not pop over to connect with me on Instagram or Pinterest to see more of my latest projects!
If you’d like to get a better idea of the process, you can check out my latest videos here as well as videos from some of my other past projects.